One of the little-known features of Gmail is the add-ons. Gmail addons are similar to Chrome extensions that are designed to expand the functionality and productivity of Gmail. Just like the Chrome extensions, you will find a variety of addons for Gmail as well. The only difference between an extension and an add-on is that an add-on is installed only on your Gmail app, not on your web browser. Gmail add-ons let you do specific tasks without leaving the current tab.
Steps to Install Gmail Add-ons
So, if you are interested in installing add-ons on your Gmail, you are reading the right article. In this article, we will share a detailed guide on how to install & uninstall add-ons in Gmail. Let’s check out. Step 1. First of all, open Gmail on your web browser. Step 2. On the right pane, click on the (+) button to add an add-on.
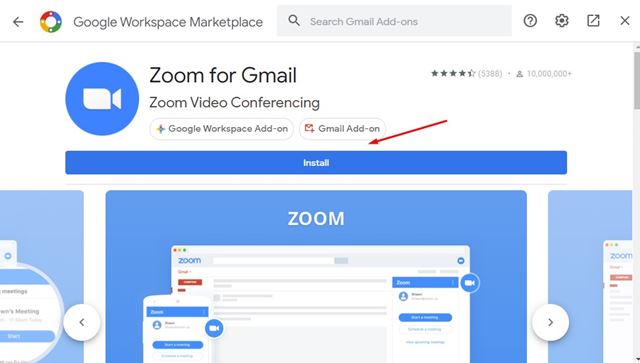
Step 3. Now you will see a Google Workspace marketplace page. You will find a variety of add-ons for Gmail on this page.
Step 4. Click on the one that you want to integrate with Gmail. Step 5. On the next page, click on the ‘Install‘ button.
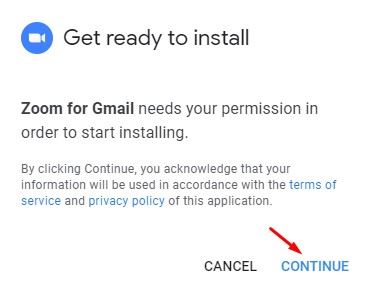
Step 6. On the confirmation pop-up, click on the ‘Continue‘ button.
Step 7. You will find the newly added add-on on the right pane. That’s it! You are done. This is how you can install add-ons in Gmail.
How to Uninstall Gmail add-ons?
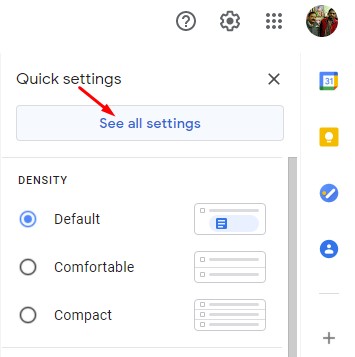
If you want to uninstall any specific Gmail add-on, you need to follow some of the simple steps below. Here’s how to uninstall add-ons in Gmail. Step 1. To uninstall Gmail add-ons, you need to open the Settings gear icon as shown below. Next, click on the ‘See all Settings’ option.
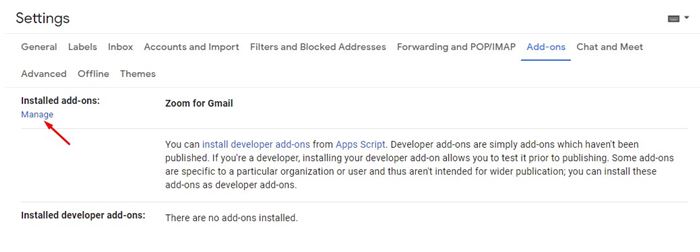
Step 2. On the next page, click on the ‘Add-ons’ tab.
Step 3. Next, click on the ‘Manage‘ button under the Installed add-ons.
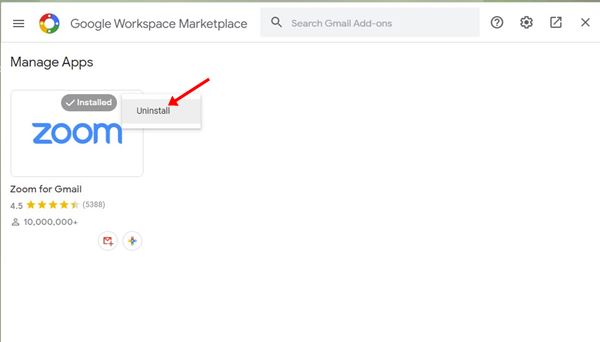
Step 4. On the following pop-up, click on the three dots and select ‘Uninstall’
So, this guide is all about how to install & uninstall add-ons in Gmail. I hope this article helped you! Please share it with your friends also. If you have any doubts related to this, let us know in the comment box below.


